Wednesday, December 18, 2013

Salt Dough Ornament Fun!

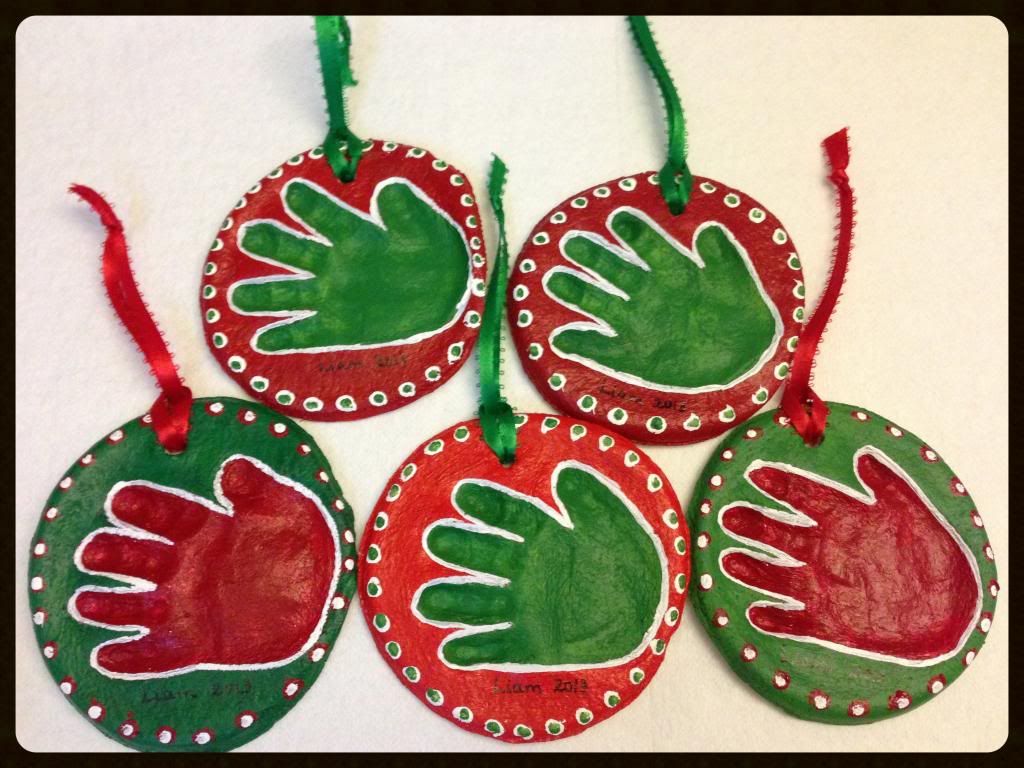
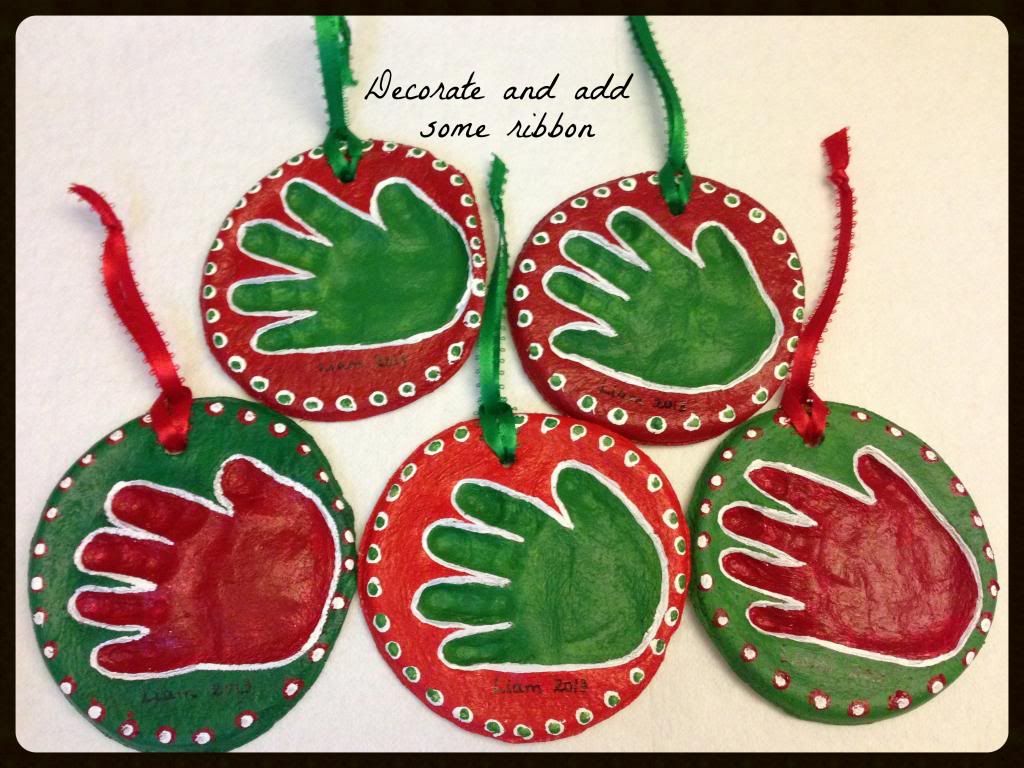
Aaah the holiday season! One of my favorite times of the year. I love all the holiday drinks at Starbucks, Christmas music, the smell of cinnamon and pine, the twinkling of lights on the tree. This is the first year in a long time that I don't have a class of little ones who are bouncing around the classroom, barely able to sit through one story or math lesson. While I don't have a class to make cinnamon dough ornaments with, I do have my own precious little one! I thought it would be fun to make some handprint ornaments for the grandparents. So, a few girl friends and I got together with our little ones and attempted to make some ornaments - ha! Have I mentioned that all our little ones are younger than 6 months?! It took several times but we finally got some good ones. It was quite an experience! We decided that cinnamon dough was probably not the best idea since they have their hands in their mouths constantly these days, and we didn't want any lingering cinnamon to burn their little tongues. One of my friends, who also used to make ornaments with her class, suggested a salt dough that she has used in the past. It is quick and easy to make and produces a wonderfully smooth dough for little hands. 

The original recipe comes from Olive Juice Mama. It's a great blog!

2 cups flour
1/2 cup salt
3/4 cup warm water

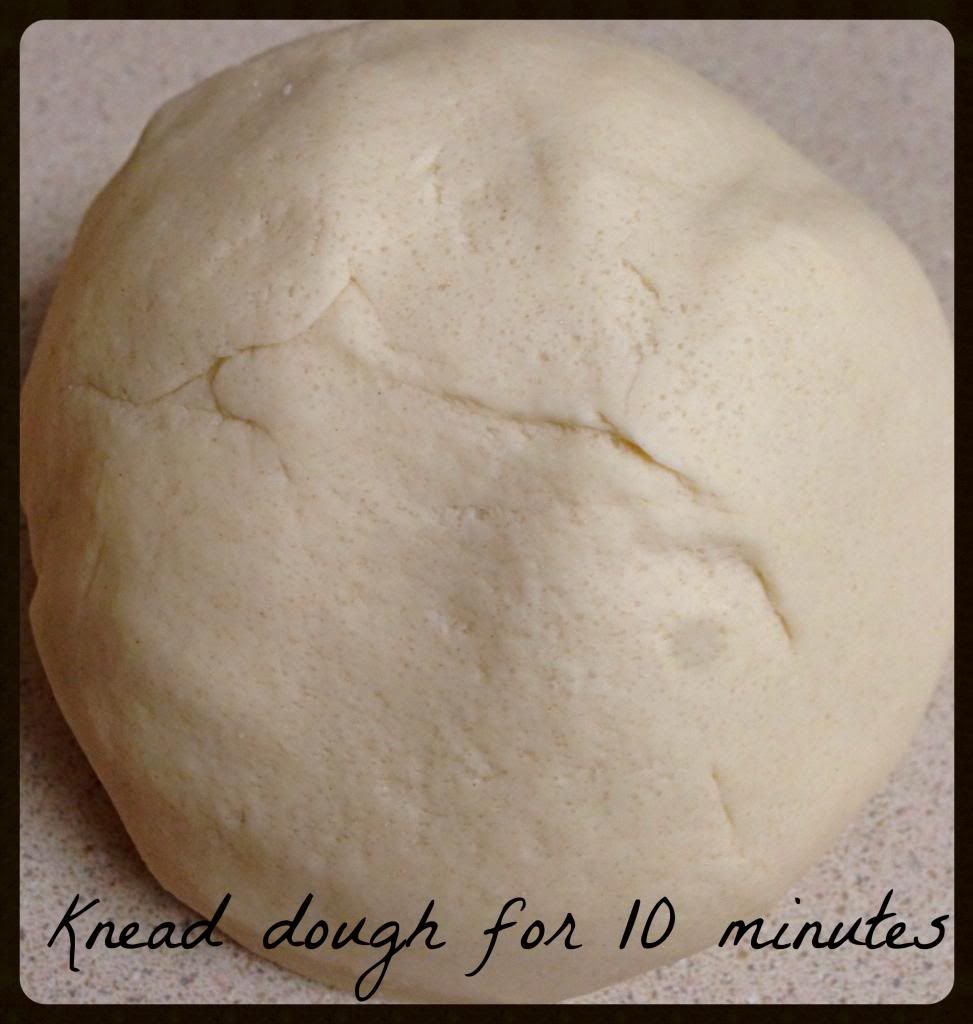
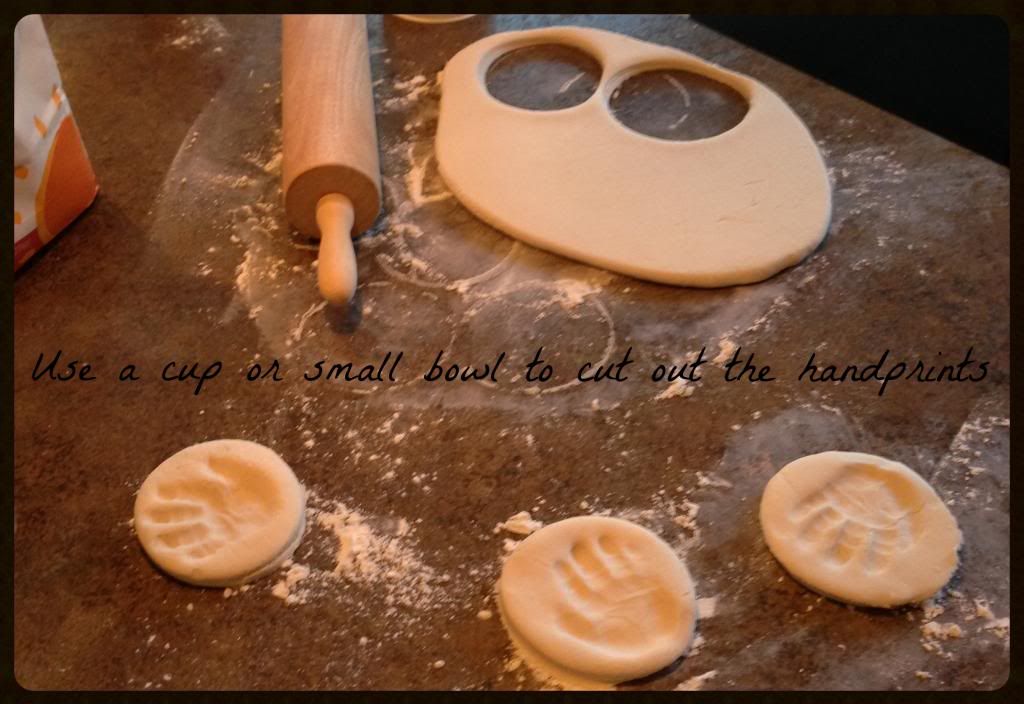
Mix all of the ingredients in a bowl until a ball forms. Sprinkle a little flour on the counter to knead the dough on. While you don't technically have to knead it for 10 minutes, it makes the dough wonderfully smooth if you do and bakes up much nicer :) Plus, it's good exercise so go for it! Once the dough is kneaded, roll it out to about 1/2" thick. I was able to make 6 handprints (my little guy is 4.5 months old). I made 5 and then had to re-roll out the dough for the 6th. 


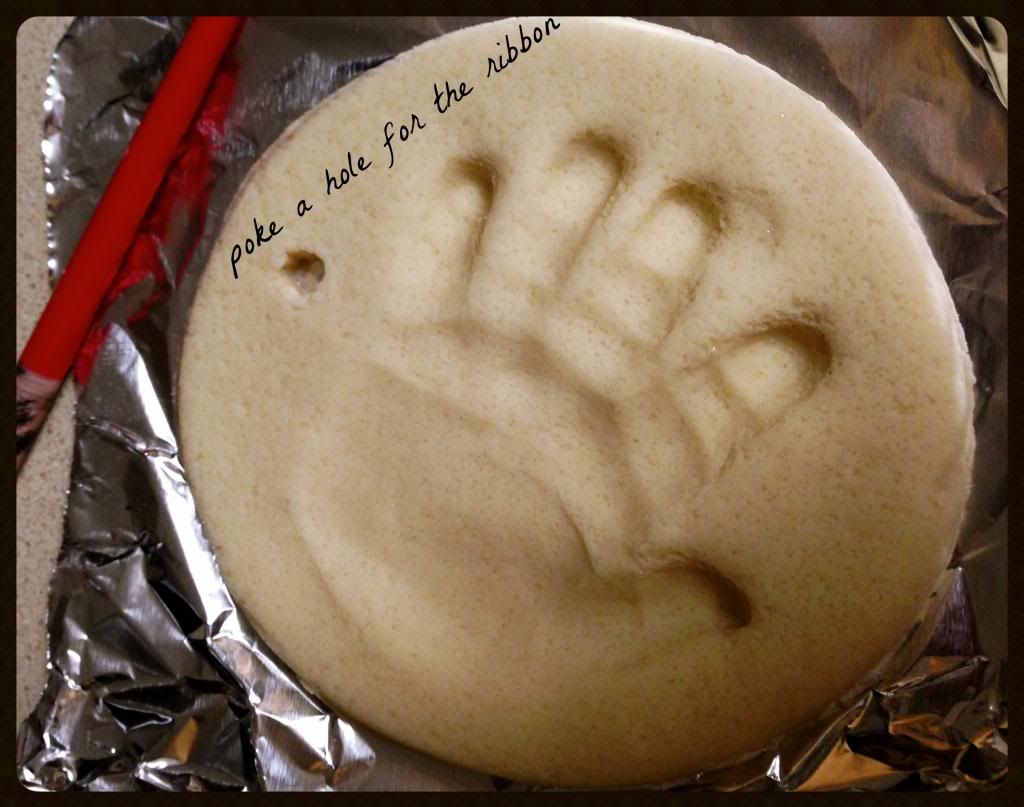
Bake at 200 for 3 hours, then flip them upside down and bake for another hour. I baked mine in the toaster oven to save a little money on electricity :) Once they were cool I painted them with acrylic paint, used a marker to write my little one's name and the year, and  added some ribbon. Gifts for the grandparents complete!


Friday, November 8, 2013

Blog Hop and Giveaway!!


Welcome to my blog!                  I am so  excited to be participating in this Blog Hop! 
Thank you to Jessica from Hanging out in First for setting it all up!!

We are celebrating all that we are thankful for and that includes teachers.  We want to show all of you how much we appreciate you.  Teachers do so much and this is our time to give back and say thank you!  Thank you for showing your support by following our blogs and/or stores!  Thank you for all the hard work you do, for collaborating and for sharing!  Thank you, thank you, thank you from all of us participating in this hop :)
             You have made it to blog

           Grab my FREEBIE here       


 I have created a Thanksgiving Math and Literacy Center Multi Pack. The worksheets are designed to be fun and festive while still promoting learning! Click on the image to head on over to my TpT store to grab it. I would love some feed back on what you think!


Join us by hopping through each blog and gathering lots of Thanksgiving and autumn freebies.  In each freebie you will find a picture of a pie with a word on it. That word will tell you something that teacher is thankful for.  Record all of the words on your recording sheet and follow each blog along the way so that you can enter the amazing giveaway at the end!

You may start anywhere along the hop, but if you would like to start at the beginning you may go here.  This is also where you will go in the end, for the giveaway!!


Now hop over to the next stop on your journey:


Mrs.Payton'spreciouskindergarteners

Wednesday, November 6, 2013

Quick and Easy Play Dough Recipes for the Classroom or Home

I have fond memories of my mother making play dough for us when we were young. She made us the cooked kind, and I remember thinking that it took FOREVER to cool enough to play with :)  When I started teaching I began making play dough for my class. Making your own play dough is much cheaper, can be made in large batches and lasts longer than what you buy at the store. It can also be jazzed up in fun ways! When I taught preschool, we actually had the parents sign up to make us new play dough every month, as we went through it pretty quickly in our preschool classroom. I did not make it that often for my Kindergarten class. 

The first recipe is for cooked play dough. Despite what many think, cooked play dough is not a scary thing! Yes, your pan and spoon look terrible afterwards, but 10 minutes of soaking takes care of it. I have found that cooked play dough lasts a little bit longer and is smoother than the uncooked version. 

Recipe for Cooked Play Dough
1 cup all purpose flour
1/2 cup salt
1 cup water
1 TBS oil (see notes)
2 tsp cream of tartar (see notes at the bottom)
Food coloring or powdered drink mix (such as Kool-Aid)

Mix the dry ingredients together in a medium sized sauce pan. Add the water and oil (and food coloring if not using the powdered drink mix) and stir them together. Stir continuously on medium heat, making sure to move your spoon around the entire bottom of the pan. As you can see above, the mixture begins to thicken quickly on the bottom of the pan. Continue to stir until the mixture has formed a ball in the center of the pan. Carefully pinch the dough to make sure it isn't too sticky, then carefully remove and place on a plate or tin foil to cool. 


I used powdered drink mix in the recipe above. I used Kroger brand powdered drink mix in place of Kool-Aid in the recipe above. It produced a wonderful, bright red and the play dough smells like cherries!

Recipe for Un-Cooked Play Dough
3 cups all purpose flour
1 cup salt
1 cup water
1 TBS oil 
2 tsp cream of tartar 
Food coloring or powdered drink mix (such as Kool-Aid)

Mix the dry ingredients together in a bowl. Add the water and oil (and food coloring if not using the powdered drink mix) to 1/2 of the dry ingredients and stir them together. Stir in the second half of the dry ingredients. You may find that you need to add a dash more flour. Once it has formed a ball, as shown above, dust the counter and knead the dough until it is smooth. 
For the uncooked version I used neon blue food coloring. I prefer the neon colors as they are much brighter than the regular pack of colors. 


Store in zip lock bags.

As I mentioned above, one of the best things about making your own play dough is that you can jazz it up. I like to add some extract, such as peppermint, cinnamon or lemon. You can also add glitter, which my students have always gone crazy over! Have fun with it! I hope your students and or children enjoy playing with the play dough you make :)

Both of these versions make great dough for your kids to play with. The cooked version is a little smoother than the uncooked, but the kids don't care a bit about that. The cooked version does last a little longer. I used play dough in my Literacy Centers every few weeks and only made it three times during the school year. 


***Notes***
* I like to use baby oil instead of vegetable oil - it makes the play dough very smooth and it smells good! 
*Cream of tartar is NOT the same thing as tartar sauce!! Cream of tartar is a white powder that can be found in the spice aisle of the grocery store. It is not necessary for the recipe to work, however it helps the play dough to last a little longer. 


Monday, November 4, 2013

The Amazing Spaghetti Squash

Now that Fall is upon us once more, winter squash has taken over the vegetable section at the grocery store. I love acorn, butternut and delicata squash, however my husband does not. I therefore do not often buy it. For a while now I have been hearing about how great spaghetti squash is, but had not thought too much about it, thinking that it was probably on the sweeter side and that it wouldn't go over so well at dinner. Oh yeah, have I mentioned my husband is Italian?

I finally bought one a few weeks ago and gave it a shot, telling him several times that it was fine if he didn't like it and that he could eat the left over Thai food if he just couldn't choke it down. Well... it was AMAZING!! We both loved it so much that we had it for lunch the next day and he has requested it several times since. In fact we just had it again last evening. One of the best things about spaghetti squash is that you get that nice, satisfying taste of spaghetti but without the heavy feeling and tiredness that a full bowl of pasta can bring on.

So, even if it sounds crazy to substitute a squash in place of your beloved pasta, just give it a try anyway; you may be pleasantly surprised. If my Italian, pasta loving husband loves it so much, chances are good you may too. And if you're worried about it being a total failure, than have a back up frozen pizza on hand that you can bake in 15 minutes :)


Here is how I make it.

Preheat the oven to 350.
 (See the bottom for an alternative cooking method)

I look for a squash that has a nice yellow color to it and that feels heavy for it's size. A medium sized squash makes enough for us to have dinner and lunch for the next day.

Wash the squash and poke a few holes in it. I use the tip of a sharp knife and poke about 8 holes.
Set the squash on a tray covered in foil (this just makes for easier cleanup) and place it in the center of the oven. Set the timer for 30 min. After 30 min flip the squash over and set the timer for another 30 min. Flipping the squash helps it to cook evenly all the way through. I did not do this the first time and there was a big squishy spot on the bottom where it had rested on the pan for an hour.

Let the squash cool for about 5 minutes then cut in half. Remove the seeds, then use a fork to gently pull apart the strands of the squash. They look just like noodles!! It's pretty cool :)

We like our spaghetti squash with red sauce (I like to get Newman's Own - it's delicious and all their proceeds go to charity), turkey meatballs and some parmesan cheese.


           Buon appetito :)
 I hope your family loves this meal as much as mine does!

**You can also cut the squash into quarters and and steam it for about 10 minutes**


Friday, October 25, 2013

Homemade Baby Wipes - Not just for babies!

While I was growing up, we always had a job wheel/chart both at school and at home. At home we often complained about doing our chores, however at school having a job/chore each week made us feel important. This did not prevent us from sweeping the dirt under the carpet, however. Imagine our surprise when we came in one Monday to find the carpet gone! Haha. 

Anyway, when I became a teacher I made sure that every child had a job each week instead of every other week. One of those jobs has always been Table Washer. Since the little guys can't use Lysol wipes (they were actually banned at my school), I have always asked for baby wipes. The baby wipes come in handy after cupcakes and craft projects too! 

Now that I have a little one of my own, I have started making my own baby wipes. One, it is WAY cheaper and two, it is better for his bum :) I got to thinking and realized this would be a great way to save money in the classroom as well! 

So, after asking several girlfriends for recipes and looking up a few recipes online, I combined several and settled on this simple recipe that has worked quite well so far. Here it is!

What you will need:
1 roll paper towels (I use Viva because they are thick and soft and hold up really well)
A large knife (I use an old one that I don't really use for cooking anymore)
Measuring spoons and cup
Container with lid
Coconut oil 
Baby soap
Water
Zip lock bag (gallon size)

I have found that if you buy a single roll it has more paper towels on it than do the rolls that come in the multi packs. So, I have played around and adjusted the recipe to fit both size rolls. You are welcome to adjust it as you see fit!

Recipe (if you purchase a single roll then double this recipe) :
2 cups hot water
2 TBS coconut oil
2 TBS baby wash


Use the knife to cut  the paper towel roll in half. I've found that a flat blade works better than a serrated blade, as the serrated blade rips the paper towels and causes a bunch of fuzz. Place each half in a container. Mix the hot water, coconut oil and baby wash together. I use hot water so the coconut oil melts (if you keep your house very warm than it will stay melted all the time). 

Pour 1 cup over the tops of the rolls (1/2 cup per each roll). Pour slowly or it splashes all over - I know this from experience. Wait about 10 min and flip the rolls over. Pour the remaining mixture over the tops (1/2 cup per each roll). Wait about another 10 min or so and they will look like the photo on the left. Pull out the cardboard pieces (photo on the right). 


Pull the paper towels out of the center and voila! Homemade baby/classroom wipes :) I tried putting them both in the same container, as shown above, however the container was a little too small and I couldn't pull the wipes out, so I put one roll in a zip lock bag until I needed it. I make these as I need them, as I have found that they will mold if kept for longer than three weeks. Keep a lid over the top (I don't snap it on, just set it on top) or the wipes dry out. 

For Classroom Use
I would suggest eliminating the coconut oil from the recipe if you are going to make these for your classroom. You don't want the tables getting greasy. These are super easy and pretty fast to make. You could have a few parents donate paper towels and the baby wash and either make them yourself or ask a parent volunteer to make them for you. 

I hope you've found this post helpful whether you're a mom, a teacher or both!


Sunday, September 8, 2013

Literacy Center Link-Up

Sunday, August 25, 2013

Games for at Home or in the Classroom

I'm back! So the last three weeks have flown by. I can't believe our little guy has outgrown his newborn clothes and is already three weeks old!! Getting all the snuggle time I can in now since time is already flying by. 

During a late night nursing session I came across this site on Pinterest. Featured are 20 different games that can be used in a classroom setting, at home, for a birthday party etc. They range from silly to educational, from old games (anyone remember "Mother May I?") to new. 


The games are on Spoonful where you can find directions on how to play the 20 games mentioned above. There are lots of other neat ideas from arts and crafts to recipes on the site as well. 

Do you have certain games that you play at the beginning of the year to help your students get to know one another and feel more comfortable in the classroom? Any games you play at birthday parties with a group of children? I would love to hear your ideas!

Monday, July 29, 2013

STORE WIDE Teachers pay Teachers SALE

Tuesday and Wednesday I will be having a STORE WIDE SALE! Everything will be 20% off and each day there will be a surprise FREEBIE for you!! If you have any items wish listed is the time to snatch them up!!


Here are just a few examples of the things I have in my store! Click on any picture to go to my store and check out more :)


Sunday, July 28, 2013

Classroom Organization Tips

It's almost time to start thinking about school again! If you are anything like me, setting up your classroom for the year is one of your favorite things to do. It's a chance to start fresh, try new things and change what you feel didn't work from the year before. I love being able to reorganize my room and get things all ready to go for my new class of little ones!!
This is a great idea! I have two of these bins. I label a drawer for each day of the week and one for copying. I put all the papers and smaller books I will need for each day in the drawers and it works GREAT! I also make sets of things I will need a few weeks ahead of time, clip them together and date them. I love the idea of having a "Grade" and "File" drawer as well. Going to have to try that!

I love this! Nice way to keep students from interrupting you while you are teaching.

This is a fantastic idea, especially if you teach younger grades. There are SO many things that we have to get ready for each new little one who joins our class! Definitely doing this.

Click on this picture to take you to The  Classroom Creative for even more fantastic ideas!

Wednesday, July 24, 2013

Triple Chocolate Chip Cookies

If you like chocolate chip cookies you are going to LOVE these cookies. My husband cannot stop raving about them!!! Even this girl, who would usually rather have a nice oatmeal raisin cookie, likes them. Since being pregnant chocolate has become more appealing! Wonder if that will stick around...

The original recipe can be found on the blog Cinnamon Spice and Everything Nice. Love the name of her blog. She adds cinnamon to the dough!! I have never seen that before. While the cookies don't taste "cinnamony"you can tell that there is something special about them. Here is my slightly adapted version.


Triple Chocolate Chip Cookies     preheat oven to 375
3 sticks unsalted butter, softened
1 cups white sugar
1&1/4 cups packed brown sugar (I like to use dark brown sugar in my cookies)
2 large eggs
1 Tbs vanilla extract
4 cups flour
1 tsp baking powder
1tsp baking soda
1 tsp salt
1/2 tsp cinnamon
3/4 cups milk chocolate chips
3/4 semi-sweet chocolate chips
3/4 cups white chocolate chips
*It would be fun to try other chips - butterscotch, cinnamon, peanut butter etc*

Cream the butter and sugar together in a large bowl; add eggs and vanilla and mix. In a separate bowl mix all the dry ingredients together. Add the flour mixture to the butter mixture in thirds. Stir in the chips by hand. To make these cookies jumbo sized use a 1/4 cup and drop onto sheets about 3" apart. I went the jumbo route and they took about 15 min to cook. I rotated the pans after 7 minutes. 
If you are going the "normal" cookie sized route, make sure to adjust the cooking time accordingly. 
Make sure to enjoy one warm from the oven with a cold glass of milk! I had almond milk, of course :)


Tuesday, July 23, 2013

How Can we Curb the Summer Slump or Summer Slide?

As a teacher I am well aware that students lose some of their academic knowledge over the summer. It is one of our biggest challenges as teachers and something we are constantly talking about amongst ourselves. Yesterday I heard an interesting program on NPR which discussed the reading programs at our local libraries and their efforts to curb the "summer slump" or "summer slide." One of the researchers on the show discussed how students from middle income and low income families lose about the same amount over the summer in math, however there is a huge gap in the reading loss. Students from middle income families lose about one month but students from low income families lose about 3 months. Not only is this a big difference, the lose is cumulative over each year and can mean the difference between a student dropping out of high school or going to college. 

Here is a link to an interesting article on this topic: 

There are several ways that the summer slide is being tackled. Summer School, Summer Reading Programs offered by local libraries etc. All of these programs will only help those students who attend, however. That is the real challenge - educating not only the students but also the parents on the importance of reading to and with their children. Scholastic suggests three easy ways to help your child keep up with his/her reading over the summer:

Our local libraries are pairing up with some of the summer school programs in the area to bring books to children who may not otherwise be able to check out books from the library. They also offer exciting programs at their locations, such as magic shows, bringing in animals etc. to get children excited about all the different topics you can read about. 

What kind of programs are in your local area? What are your thoughts on the issue of the "summer slump/summer slide?" I look forward to reading your comments!

Monday, July 22, 2013

Cursive Alphabet Line


Quinoa Salad

Today I bring you quinoa, one of our favorite meals. Quinoa is a grain-like seed that is similar in size and texture to couscous but is a complete protein. It's a great alternative for those nights you don't feel like meat or when you need a light meal. My husband and I enjoy it and eat it regularly. This is our favorite way to make and eat it!

Quinoa Salad Mediterranean Style
1 cup quinoa (uncooked)
1 cup chicken stock or water
1 pepper (any color)
1/2 box grape/cherry tomatoes or two Roma tomatoes
1 small jar or 1/2 can artichoke hearts (I get the marinated kind)
1/4 cup kalamata olives (chopped, 1/2 cup un-chopped)
4 scallions (include green ends)
1/2 cup feta cheese crumbles
1/4 cup olive oil
1/2 tsp black pepper

Some people suggest you rinse the quinoa before cooking as it can have a "soapy" flavor otherwise. I always used to until I forgot one time and realized that it didn't make a bit of difference, so I don't bother any more. 
Cook the quinoa as you would rice. I like to use chicken stock to give it a little more flavor, but vegetable stock or water works just as well. 

Chop the veggies etc into small, bite sized pieces. I chop the scallions extra fine. Other than the measurements for the quinoa, the rest is all to taste. You can obviously change the amounts of any of these ingredients, add your own or take away what you do not like. If you choose to add a dash of salt, watch how much you put in as the olives and feta cheese are quite salty. I find that between the two there is no need to add extra salt. 

Mix all the ingredients together and enjoy! I go ahead and mix it while the quinoa is warm. We eat it warm or cold, it is good both ways. This quantity makes enough for dinner for the two of us and then lunch the next day. 

I used orange pepper this time. Sometimes I use a mixture which makes it extra pretty and tasty! My husband came home from work  starving and I completely forgot to take a photo of it all mixed together. Next time! 

There are lots of different ways to make quinoa. I'd love to hear how you like to make it or how you like it if you try it out for the first time! Enjoy!

Friday, July 19, 2013

ABC Handwriting Books and Morning Worksheets

Here are my latest projects in my TpT store! These sets make great Handwriting Books for the beginning of the year or they can be used individually as morning work papers or in Literacy Centers.
There are two different sets available in either Print or D'Nealian:

Set 1 has pictures that the students color a certain color based on whether the picture is next to an uppercase or lowercase letter. This is a great way to help them learn their color words and to reinforce the use of the word wall.

Set 2 has a place at the bottom of the page for the students to draw their own picture of something that starts with the letter on that page. This helps them with their beginning sounds.


Enjoy!

If you like my products and would like to be kept up to date on what I post you can "Follow" me on Teachers pay Teachers.


Monday, July 15, 2013

FUN Fine Motor Activities for your Preschooler or Kindergartener

Do you have an energetic little preschooler who will be going to Kindergarten soon? Here are some great activities that you can do with your little one to help get him or her get ready for all the writing they will be doing in Kindergarten. 
These are also great things to do with your current Kindergartener who may still be struggling with his or her fine motor skills. 

Activities
*Hide beads in play dough and have your child pick them all out
       *to make this more educational use alphabet beads         
*Use a turkey bastor to blow ping pong balls into a goal
*String pony or alphabet beads/dyed pasta onto pipe cleaners
       *to make this more educational have your child make patterns
         or spell their name with the beads/pasta
*Use fingers/tweezers to pick up pompoms, buttons, dried beans...
       *move from one dish to another or sort by size/color
*Work puzzles
*Pour sand, rice, dried beans etc. from one container to another
*Use broken crayons to color - this encourages children to pinch
        instead of grasping with the whole hand
*Sort your snack! When eating colored goldfish or the like have 
        your child use their thumb and pointer finger to pick and 
        sort their snack before eating
*Cut a whole in the top of a bottle and have your child push
        pennies, marbles etc, through the top

These are all activities I have done with my Preschool and Kindergarten students. Make sure to have fun doing these activities with your young ones! You don't want to push them or stress them out. If you have any questions please feel free to ask in the comments below.

Saturday, July 13, 2013

Waffles - Great for Busy School Mornings

This morning I made waffles. Delicious, whole grain, healthy waffles! As with the spanakopita we ate some and the rest went into the freezer. I have frozen these before during the school year for a quick breakfast and they freeze very well. Just pop them in your toaster and they are ready to go! I love that this recipe uses whole wheat flour, flax seed, applesauce etc. 
Seriously, these are delicious! They have a nice  nutty flavor to them and are just slightly sweet. A must try if you like waffles or need something quick in the mornings that can be eaten in the car if necessary - I cover mine with peanut butter and wrap them up in a paper towel for those especially busy mornings. Click on the picture for the link to this recipe.


This morning I covered mine with greek yogurt, some 
thawed berries and of course, maple syrup - REAL 
maple syrup, not that maple flavored corn syrup. YUM!! My husband loves these waffles too, although he goes the more traditional butter and syrup (maple - he's been converted!) route. 


These waffles are now in the freezer just waiting to be eaten! 
I hope you enjoy this recipe! They are great for busy school mornings so keep this recipe in mind for when the school year starts and things get hectic again.

A Gummy Science Investigation

These look like such fun investigations to do with your kids at home or school! It could be a great science lesson or a fun summer project to help with the "Mom, I'm bored..."

I found both of these ideas on Pinterest. You can click on the link for the gummy bears and the picture for the worms to head over to the original blogs for complete directions. I know my Kinders would especially love the gummy worms! I would combine the two and use the materials in the gummy bear project and use the worms instead of bears if I were making this a lesson.


Let me know if you have a chance to try this out, either with your own kids or students! 

Friday, July 12, 2013

Spanakopita

My husband has been asking me to make spanakopita recently so Wednesday evening I did - not that it took much convincing. I love the stuff! After dinner the rest of it went into the freezer for "emergency" meals for when the baby comes, much to his disappointment! He wanted to eat more the next day :) Now I am no expert in Greek food and have no idea how close this recipe comes to traditional spanakopita, but I do know it is delicious! Click on the picture to go to the recipe I used. 

The recipe calls for cottage or ricotta cheese, along with feta of course. I used cottage cheese (we both prefer cottage over ricotta, even in lasagna) and it worked wonderfully. Now if you know me, I tend to cook by the seat of my pants so to speak, generally don't measure things and have a hard time staying true to a recipe without changing something. At this point I must confess that I did add a few mushrooms that needed to be used up... I actually don't usually use recipes but cook by instinct instead. It has rarely let me down. 

However, I am SO glad I looked up the recipe for this spanakopita and took the time to compare it to several others, because there were two things that I would never have added had I not read through several recipes. Can you guess what they are? If you are familiar with cooking Greek food then I'm sure you  know, but they surprised me. Nutmeg and dill. A lot of dill. And boy did following the recipe pay off. It was absolutely delicious!!! This will definitely be added to our list of favorite meals :)

This recipe makes TWO 9x13 pans, so I cut it in half. When you buy phyllo dough the box comes with two packages. By cutting the recipe in half I used only one package, so I am currently debating on whether or not to make a second pan next week or to make some baklava. Mmm, both such delicious choices! Hope you enjoy this spanakopita as much as we do if you try it out! 
Happy cooking :)

Thursday, July 11, 2013

Freebie!

Check out this cute freebie in my Teachers pay Teachers store! Welcome your students to class with this Welcome postcard. Enjoy!


Monday, July 8, 2013

Hello and Welcome!

Welcome to my new blog! I am very excited to share the teaching materials I create and discover with you! As I love reading and cooking I am sure to share books and recipes with you as well. I am about to have a baby boy so there will most likely be parenting discoveries too :) Enjoy!