Friday, April 4, 2014

Graphing Galore!

Wow! I can't believe it's already April! This week my husband and I have gone into baby proofing mode - that's right, Little Bean is on the move! I can't believe how quickly he is growing up! 

I wanted to take a few minutes to let you know about my latest product, Graphing Galore! Graphing Pack. There are 34 graphing pages for you to use with your Kinders or Firsties, or whomever you'd like :) And guess what - you can get a FREE 9 pg sample by participating in the Facebook Free-for-all I am a part of April 4th-6th!! At the end I will be putting the pack on sale so set a reminder in your calendar! If you need some graphs for you students then you don't want to miss out on this deal :)

Here are the pages you can get for FREE by participating in the Free-for-all! Directions and a link to the Facebook Free-for-all are at the bottom of the page. 


To participate in the Facebook Free-for-all go to my Facebook page and click on the bright yellow "Free-for-all" tab! I hope you enjoy them!! There are a TON of great teachers participating in this Free-for-all so make sure to let your friends know about it!!


Thursday, March 6, 2014

How to Make Your Own Nursing Cover

Since having Little Bean, most of my craft time has been diverted to baby things. This post will be about how to make your own nursing cover. This is slightly more involved than the simple rectangles of cloth with a neck loop that you can buy at Target etc, but it is well worth the extra effort. I have used mine many times and it works great! Of course now the little guy thinks we are playing peekaboo and he tries to take it off... little stinker ;)


What you will need:
1.25 yards cotton (the fabric I used was 45" wide)
Thread to match fabric color
2" D ring
18" of boning
(you can see the D ring and boning in the directions below)


*Cut out the pieces above. I began with a piece of fabric that was 45"x25." If your fabric is 44" wide, there is no need to add extra fabric. I often sew the same way I cook - I make things up as I go, so please feel free to adjust the measurements as you see fit!

*Place the 45"x25" piece of fabric wrong side up. Fold and press the edges up 1" all the way around. Then roll the edges under to create a 1/2" hem around the entire piece. Pin and sew.  (I don't have a pic of this step, sorry!)

*Next take the two strap pieces, fold each in half length wise and iron. 
*Open back up and fold each long edge into the center, iron, then fold back in half. Press in the short ends 3/8." Pin and top stitch around both pieces. 


*Slide the short strap through the D rings and fold in half. Stitch to hold the rings in place. 

*Fold the pocket piece in half with the right sides together, forming a 6.5"x7" rectangle. Stitch a 3/8" seam allowance around the open edges of the pocket leaving a 2" hole along one side so you can turn the pocket right side out. Iron flat. 
*While many patterns have you sew the pocket onto one of the outside bottom corners, I personally found that having it on the inside and in the center was the most convenient. This way my nursing pad stays put and can't be kicked out by active little feet, and I can easily reach it with either hand. 
*I simply folded the cover in half twice to find the center, however if you'd rather measure go right ahead :) 
*Pin to the inside of the cover (or wherever the pocket would be most convenient for you) and top stitch the sides and bottom of the pocket at 1/8." On my machine I lined up the edge of the pocket with the inside edge of the presser foot. This will close the hole that you left open when turning the pocket right side out. Also, keep in mind that because you are sewing the pocket on the inside, there will be stitch lines on the outside in the front. Initially I thought this would bug me, but I made the bobbin thread match the fabric and it's barely noticeable. 

*Next, find the center point at the top of the cover. Pin the center of the boning to this point on the inside, just below the edge of the fabric. Pin out from the center until the entire piece is held in place. Make sure that the boning is curving in such a manner that it makes the right side (the outside) of the cover pop out.

*I used the zipper foot to stitch the boning into place.

*Now, my mother taught me to never leave a raw edge showing, so I chose to cover the ends of the boning. This step is optional for you. If you want to cover the ends, cut two 2"x2" squares. Fold in the edges so they meet in the middle and iron. Stitch over the exposed ends of boning. Don't actually stitch the boning itself, it will snap your needle in half.

*Ok! Last step! Measure 2" in from each end of the boning and pin a strap onto either end. Stitch on directly below the boning, and, druuuum roll..... you're done!


Thursday, January 30, 2014

Oldie but Goodie Link-up!

Here is my oldie!


Looking for a fun way to review letter order with your little ones?
These worksheets are great way to do it! There are several different levels and three different styles for you to use with your students or child at home.  


Wednesday, January 29, 2014

Quinoa Pancakes with Berry Sauce and Cinnamon Coffee

Today is another snow day! We got a foot of snow last night! Now, as an upstate New York gal, a foot is nothing, however it is a huge deal in Virginia! The police are asking that everyone stay off the roads and everything is shut down. In NY we still went to school when there was three feet of snow! I do realize that Virginia is not as equipped to handle this much snow, however I still get a little chuckle out of it. The kids here must be thrilled. I know my Florida born husband is :)

I decided it was the perfect day to make quinoa pancakes smothered in berry sauce and some cinnamon coffee. I love these pancakes because they are pretty healthy for a pancake. I love that I have a recipe I can feel good about serving my children :) If you have not jumped on the quinoa bandwagon yet, now is a great time to do it! I grew up eating quinoa, but have just recently began to explore new recipes using it. I eat it for breakfast with yogurt and throw it in soups, as well as pancakes! It adds a bit of protein which is awesome. You can read more about quinoa here.


Cinnamon Coffee ~ simple and delicious. Just add a dash of cinnamon to your ground coffee before brewing. This morning I added a dash of nutmeg too! 

Quinoa Pancakes
3/4 cup flour (whole wheat or white)
1 cup COOKED quinoa (I used red in this recipe but you can use any color quinoa)
2 1/2 tsp baking powder
1/4 tsp salt
1-2 Tbs sugar (white or brown - I like brown)
2 eggs
1 tsp vanilla
1/2 cup yogurt (I like to use greek plain or vanilla - you could get crazy and add a flavored yogurt!)
1 Tbs milk or water

Mix all the dry ingredients then add the quinoa. Mix the wet ingredients in a separate bowl then add to the dry. Stir until combined but do not over mix. Cook as you would "regular" pancakes and top with berry sauce. See recipe below.
Cooked red quinoa
Flip when you see bubbles on the sides and top of the pancakes

Mmm delicious!


Berry Sauce
2 cups frozen berries (I used mixed berries)
1/2 cup water + 1 Tbs 
1/2 cup maple syrup
1 tsp cornstarch

Put berries, 1/2 cup water and maple syrup in a sauce pan. Turn on medium. Mix together the cornstarch and 1 Tbs water. When the berry mixture is boiling add the cornstarch mixture and stir vigorously to avoid lumps. Allow to thicken slightly then take off the heat. Pour over your golden pancakes and enjoy!!


I hope you enjoy these pancakes as much as my family and I do! 
I'd love to hear how you use quinoa in your cooking and baking :)


Tuesday, January 14, 2014

Back to the Basics ~ Inexpensive Early Literacy Ideas

When I first started teaching I couldn't believe how expensive it was to set up my classroom! Now, it didn't really have to be, however I just had to get fabric to cover my bulletin boards (it's to much prettier and it's good for the environment!), buy rugs and pillows for my reading corner, get cute posters with inspiring pictures and quotes... you know. Kindergarten requires so much cute, educational stuff! To make matters worse, I began my Kindergarten teaching career in Tampa, Florida. Do you know what is located in Tampa? A Lakeshore Learning store. An actual store where you can go and pick things up and look at them! Aah, the excitement of setting up a classroom :) I do so love it!
                                                                                                                                                           
Anyway, I am always looking for fun, inexpensive ways to get my kids excited and learning at the same time. I was reminded of how simple these things can be while I was home for Christmas.
Little Bean has some beautiful wooden toys, Indestructables books, etc, but two of the most interesting things to him were a clementine and a large mouth canning ring. That reminded me of some of the simple, everyday items that my kids loved to use in my classroom, so I thought I'd share them with you! Hope they inspire you!

First off ~ buttons! I loved playing with my grandmother's tin of buttons when I was a little girl. My sister and I would happily sit and sort buttons for quite while (my brother had no interest!). I bought these buttons in the dollar section at Michaels.
Sort by color...
sort by size...
To make this fine motor activity, I made a game out of it and had my students use tweezers or spoons to pick up the buttons - no fingers allowed! 

I just love these wooden beads! I got them at Walmart for $3.99 a bag when I first started teaching. They last forever! I have also had the kids stick them onto a pipe cleaner to spell sight words or search for them in a ball of play dough.

Super cheap and easy! A pack of 100 clothespins is $1.00 at Walmart (or at least it used to be...). I had my students match uppercase to lowercase.

Magnetic fridge letters, an ice cube tray and the same clothespins used in the above game. Again I have the kids match uppercase to lowercase.

Last but certainly not least, a cookie sheet and magnetic fridge letters. Not only does the cookie sheet keep the letters from going everywhere, but it gives the students their own defined space. As the year progressed I would switch to using words from a magnetic poetry kit I got in college. A lot of those kits have inappropriate words for young ones, so check carefully if you use them!

I hope you have enjoyed these ideas! Please share if you feel as though they would help a teacher you know. These are also great activities to do at home with your own little ones :)

Friday, January 10, 2014

Five for Friday!

This is my first time linking up with Doodle Bugs Teaching Blog for Five for Friday! I am excited to be sharing with you! I hope you enjoy reading this as much as I have enjoyed reading other's Five for Friday posts :)


Number 1: Cold Weather!
Our week started off COLD! It was not nearly as cold here as it was for many others, but 15 degrees is still pretty cold! I found ice on the INSIDE of our kitchen window when I got up to make coffee. 

Number 2: Mirror Mirror
Little Bean is loving tummy time and sitting up to play these days. He also loves looking at himself in the mirror, so I made him a mirror using our bathroom hand mirror and some cardboard. Don't worry, he doesn't touch it unless I'm right there :) He loves watching himself do pushups and gets so excited to see the "other" baby!

Number 3: Green Cleaning
I have wanted to try making my own cleaning products for a while now and finally got around to it! I used different combinations of baking soda, dish soap, vinegar and water. 
It worked GREAT!!! My favorite was how easy it was to clean splattered, dried, spaghetti sauce off the inside of the microwave. 
Mix 1/4 cup vinegar and 1 cup water then put in the microwave on high for 2 min. It steams off the gunk and all I had to do was wipe it out with a paper towel!!! Awesome :) 
Blog post with more of the recipes I used to be posted soon. 


Number 4: MLK Product {Coming Soon!}
I have been working on an MLK Product for a couple days now and am hoping to finish it up and get it posted by tomorrow! We'll see if the babe decides to nap today... ;) He's been boycotting them this week!
Here's a glimpse at one of the pages.


Number 5: Walk at the Beach
After driving home for the holidays our car was due for an oil change, so I took it in this morning. The shop where I take it is within walking distance of the beach, so Little Bean and I went for a stroll along the boardwalk while we waited. Remember how we started the week at 15 degrees? Well today it's in the 60's and tomorrow high of 71!! Crazy weather!

Happy Friday!! Thanks for reading :)


Wednesday, December 18, 2013

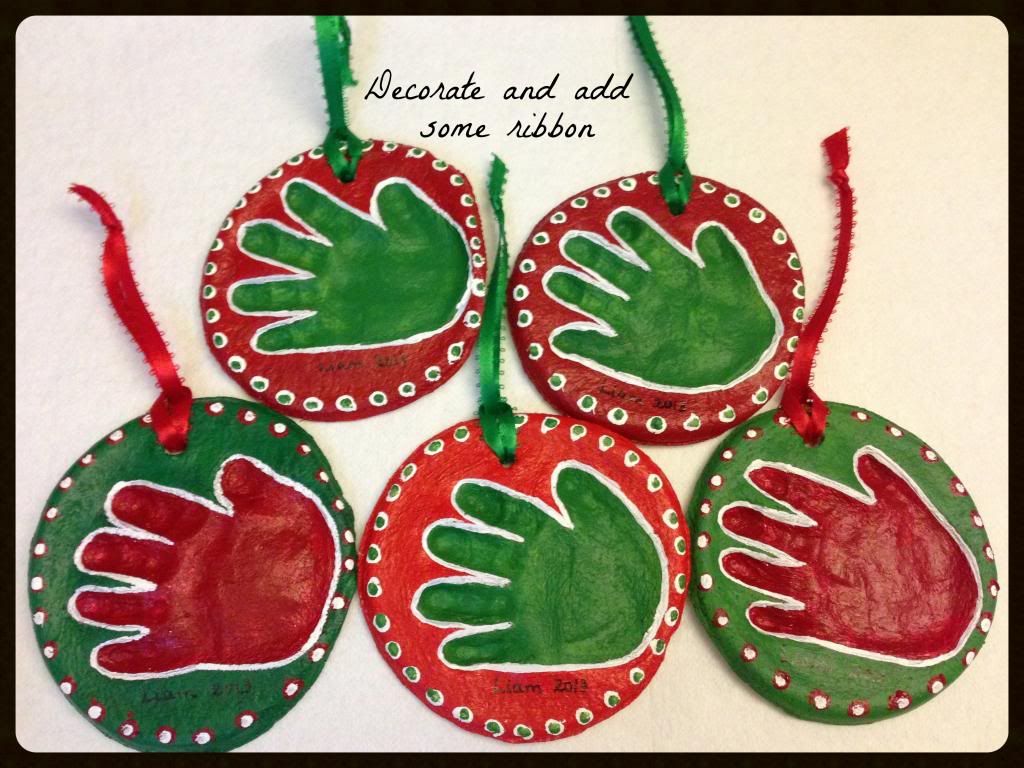
Salt Dough Ornament Fun!

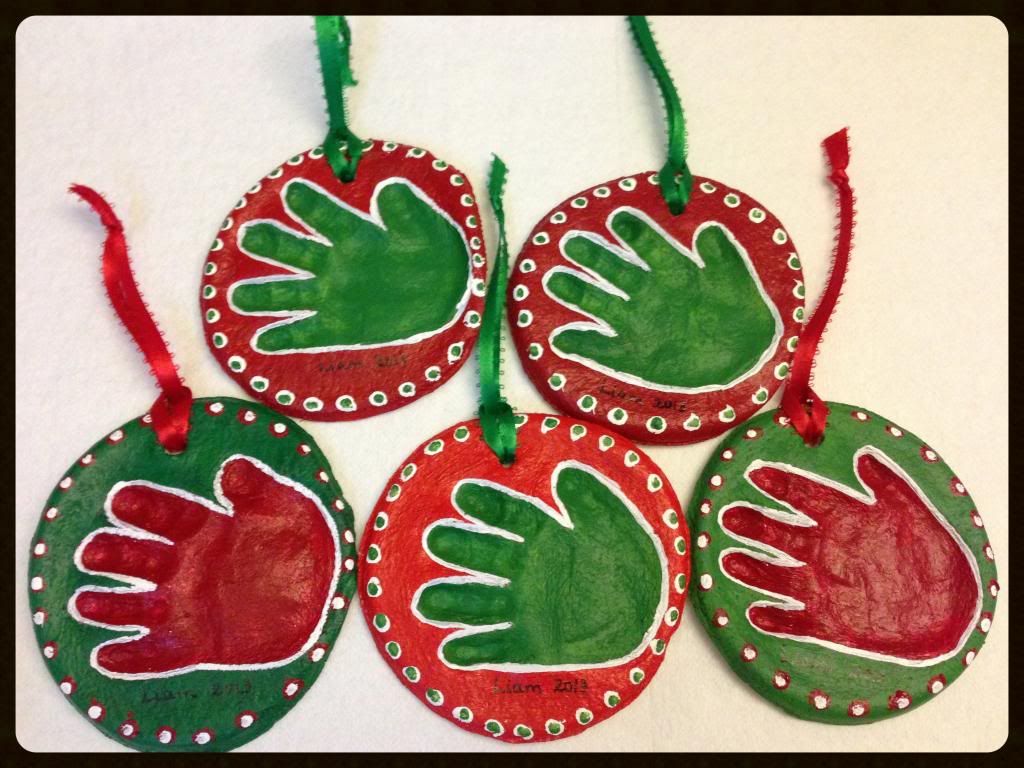
Aaah the holiday season! One of my favorite times of the year. I love all the holiday drinks at Starbucks, Christmas music, the smell of cinnamon and pine, the twinkling of lights on the tree. This is the first year in a long time that I don't have a class of little ones who are bouncing around the classroom, barely able to sit through one story or math lesson. While I don't have a class to make cinnamon dough ornaments with, I do have my own precious little one! I thought it would be fun to make some handprint ornaments for the grandparents. So, a few girl friends and I got together with our little ones and attempted to make some ornaments - ha! Have I mentioned that all our little ones are younger than 6 months?! It took several times but we finally got some good ones. It was quite an experience! We decided that cinnamon dough was probably not the best idea since they have their hands in their mouths constantly these days, and we didn't want any lingering cinnamon to burn their little tongues. One of my friends, who also used to make ornaments with her class, suggested a salt dough that she has used in the past. It is quick and easy to make and produces a wonderfully smooth dough for little hands. 

The original recipe comes from Olive Juice Mama. It's a great blog!

2 cups flour
1/2 cup salt
3/4 cup warm water

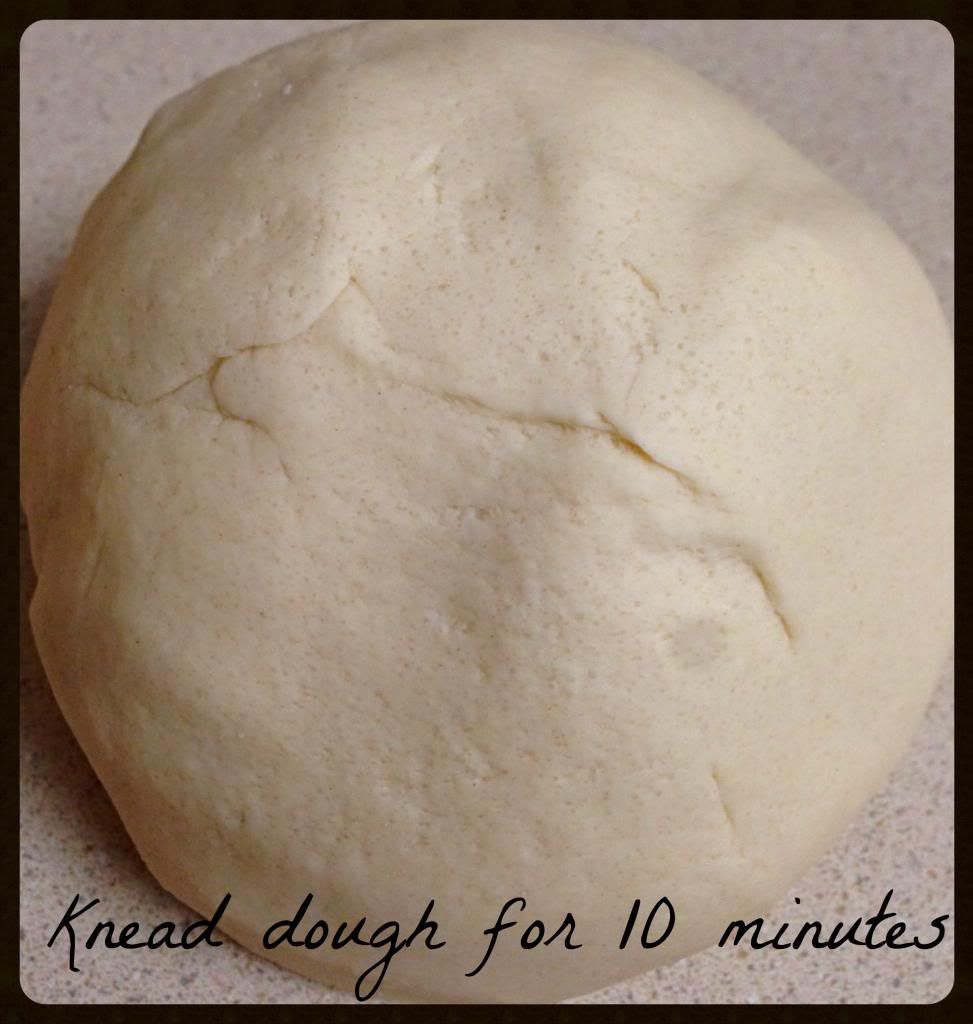
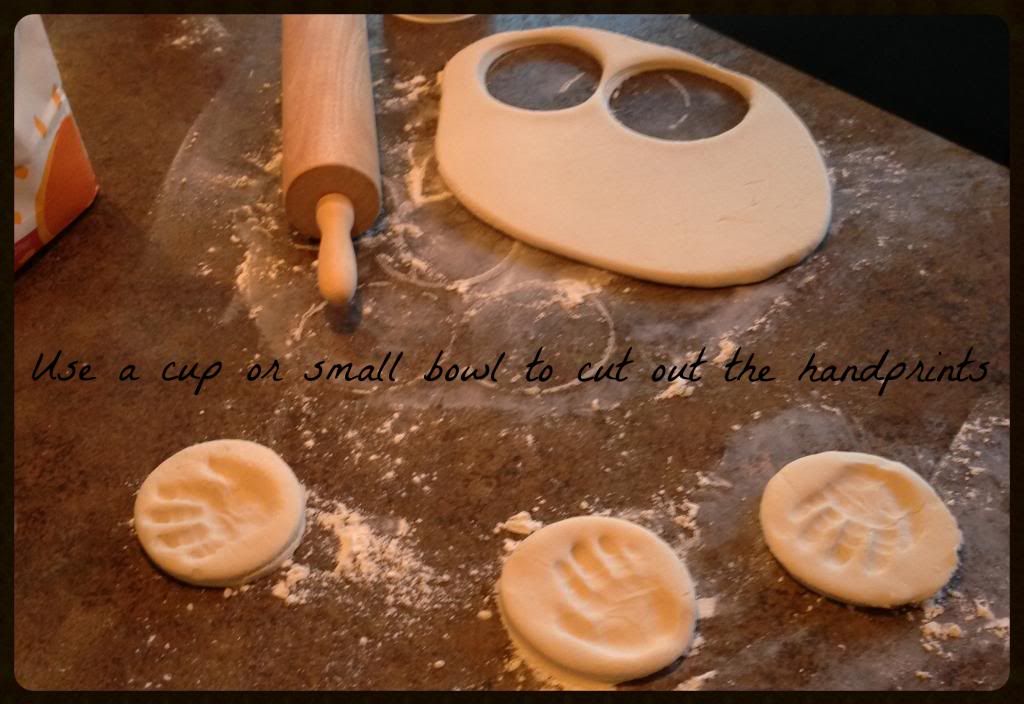
Mix all of the ingredients in a bowl until a ball forms. Sprinkle a little flour on the counter to knead the dough on. While you don't technically have to knead it for 10 minutes, it makes the dough wonderfully smooth if you do and bakes up much nicer :) Plus, it's good exercise so go for it! Once the dough is kneaded, roll it out to about 1/2" thick. I was able to make 6 handprints (my little guy is 4.5 months old). I made 5 and then had to re-roll out the dough for the 6th. 


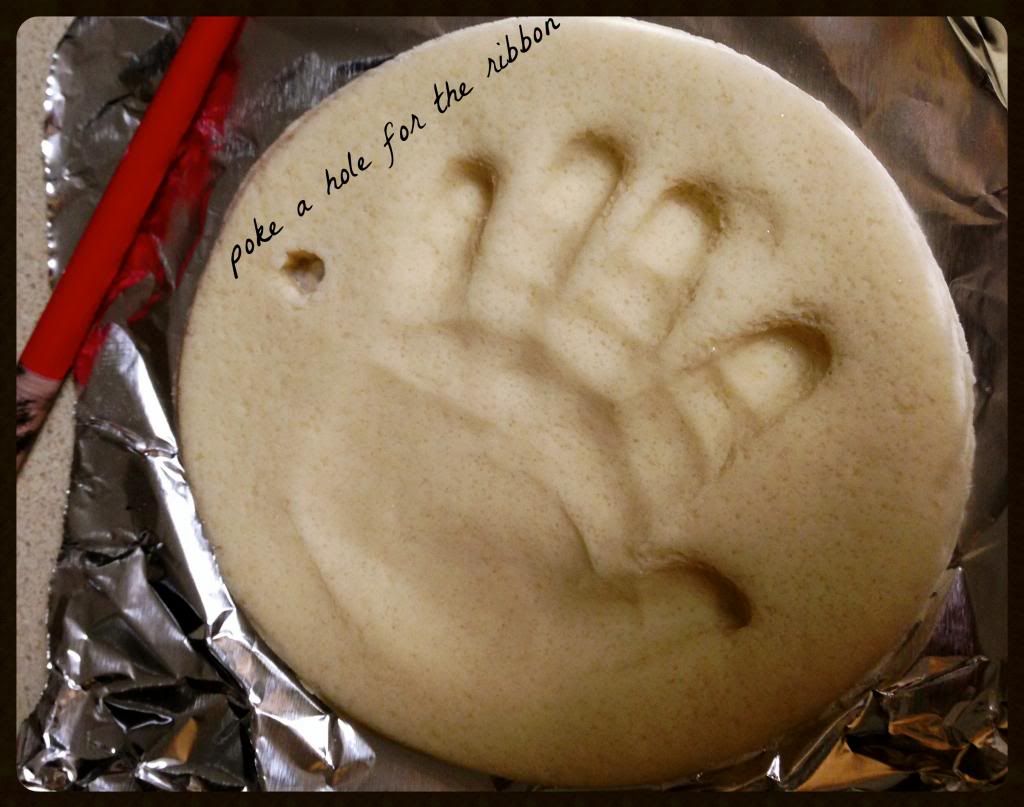
Bake at 200 for 3 hours, then flip them upside down and bake for another hour. I baked mine in the toaster oven to save a little money on electricity :) Once they were cool I painted them with acrylic paint, used a marker to write my little one's name and the year, and  added some ribbon. Gifts for the grandparents complete!